Create A Bootable Windows External Drive
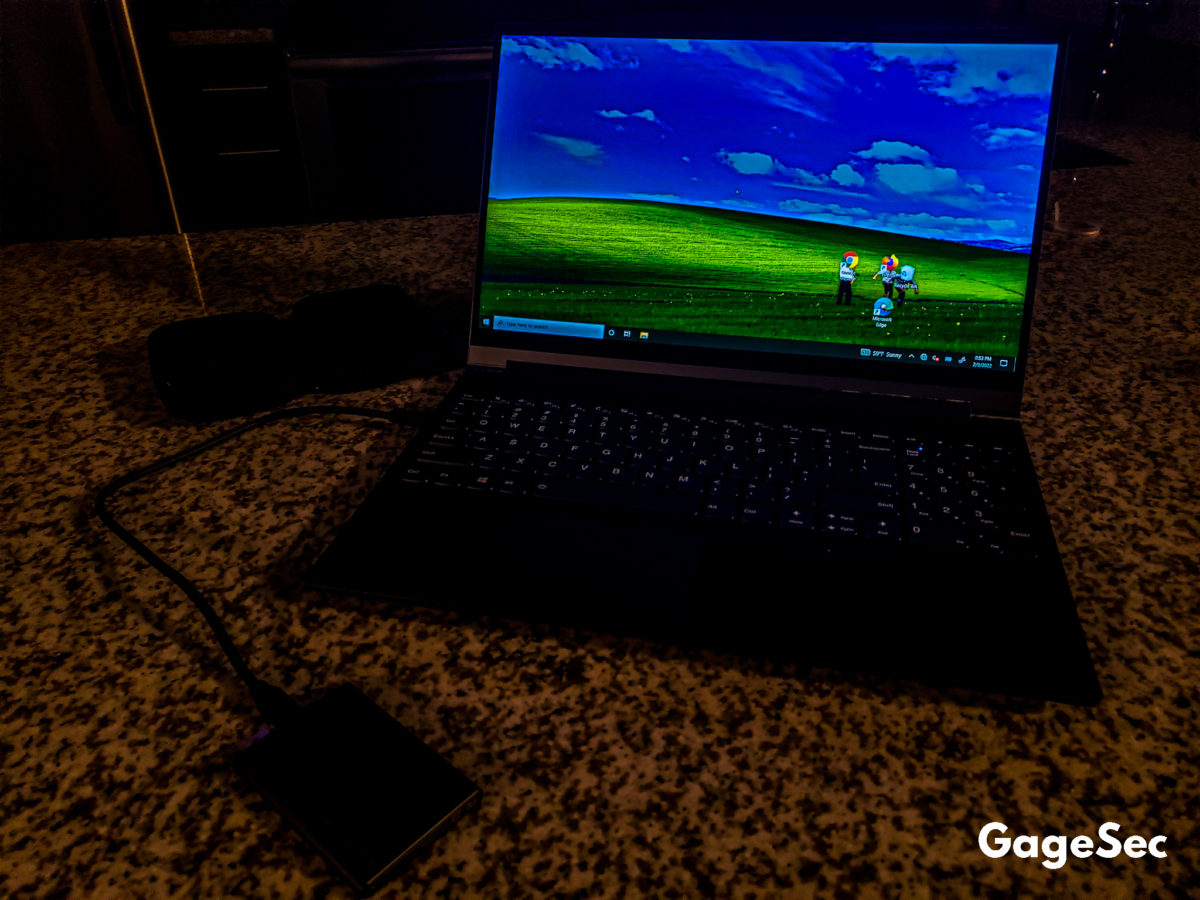
Creating a bootable Windows external ssd is a great way to mobilize your digital assets! Most external ssd’s are small enough to fit in your pocket and have lightning fast transfer speeds making them ideal for productivity on the fly. Imagine being able to plug the storage drive into a PC or a laptop and have access to all of your programs and files, and then take it with you and have all of your data on you at all times. You could even lock the drive in a safe adding an extra layer of security that would require a threat actor to also be a locksmith. After installing windows on your drive you can also encrypt either your entire drive that is password protected or shrink part of the volume in Disk Management and partition a portion to use as a regular storage drive and have a combo bootable/storage drive. If you opt for the partitioned storage, you can encrypt the partition with Bitlocker, which makes the storage require a password to access, you could then store all of your programs and files on that drive without the hassle of decrypting the drive just to boot into it.
Instructions:
- Download Widows Media Creation Tool from a Windows PC at: https://www.microsoft.com/en-us/software-download/windows10
(Link to download tool will only show up on a Windows OS)
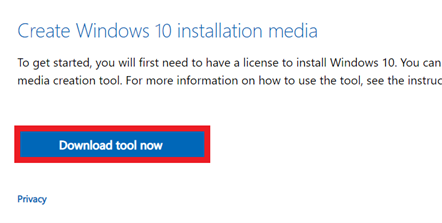
- Open Windows Media Creation Tool:
- Click “Accept”
- Wait for “Getting Things Ready” to finish.
- Choose option: “Create installation media…”
- Keep default settings and click “Next”
- Choose option: “ISO File” then click “Next”
- Save the ISO file to a memorable location. (Example: Documents/ISOs)
- Wait for the ISO file to download. (This will take several minutes)
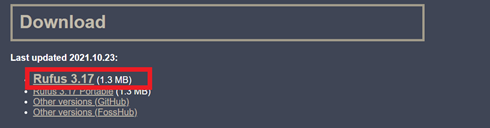
- Download Rufus from: https://rufus.ie/en/
- Insert External Drive into the PC that is being used.
- Open Rufus.
- Check “List USB Hard Drives”
- On the dropdown under “Device”, choose the external drive that has been inserted.
- Next to the dropdown under “Boot Selection”, Click “SELECT” on the right.
- Navigate to and choose the “Windows” ISO file that was created in the previous steps.
- On the dropdown under “Image option” choose: “Windows To Go”
- Ensure all options are the same: Partition Scheme: GPT | Target system: UEFI(non CSM)
- Under format options, rename “Volume label” to “LASTNAME-WINDOWS”
- Ensure all options are the same: File system: NTFS | Cluster size: 4096 bytes (Default)
- Ensure “Quick format” is checked(you can uncheck this to do a full wipe(Warning: SLOW!)
- Ensure “Create extended label and icon files” is checked
- Click “START”. Wait for process to complete. (This will take several minutes)
That’s it! Your’re done! The drive is ready to be plugged into a PC! Enjoy!